
invideo ai video
How to Get Started with invideo ai video — Core Tools & Fast Workflow
invideo ai video puts powerful AI tools at your fingertips so you can go from idea to share-ready clip fast. This guide shows you how to jump in, use the core features, and follow a short startup and publish checklist to create polished videos quickly.

If you want to try it out for yourself and see how the platform works in practice, you can start your first project for free through this special link I used to test it . That’s how I began exploring all its features without any hassle.

Key takeaways
- Choose a template to speed your edit.
- Let AI draft a script and tweak it.
- Use clear images and short clips for stronger scenes.
- Add captions so viewers can watch without sound.
- Export platform-specific files (vertical, square, or landscape).
Getting started with invideo ai video
Sign up, pick a template, and the editor loads with layers for text, media, and audio. Start small—choose a template that matches your goal (ad, social clip, explainer) and let the AI assemble a rough cut.
Quick steps:
- Create an account and choose a project type.
- Pick a template or start from blank.
- Upload footage or let AI pull stock media.
- Use AI tools to draft scenes, captions, and voiceover.
- Export and share to social platforms.
Quick tip: If short on time, pick a social-ready template and let invideo ai video generate a script and captions for you.
What invideo ai video can do for your projects
The editor handles the heavy lifting so you focus on ideas: it trims clips, matches beats, adds captions, and aligns text to scenes. Use it for thumbnails, intros, and platform-ready exports.
Core features:
- Auto-trim clips to match duration
- Auto-captioning and subtitle styling
- Sync visuals to music and beats
- On-screen text and lower-thirds generation
- Auto-resize for multiple aspect ratios
Feature table:
| Feature | How it helps you |
|---|---|
| Auto-captioning | Saves time and boosts accessibility |
| Smart scene suggestions | Speeds up storyboard creation |
| Auto-resize | Prepares one video for many platforms |
| Template library | Gives you polished starting points |
| Voiceover generation | Adds narration without hiring talent |
Which AI tools come with invideo ai video maker
The AI suite helps draft scripts, create voiceovers, suggest visuals, and polish audio.
Included tools:
- Script generator for short-form prompts
- Auto-voiceover (natural-sounding TTS)
- Visual suggestion engine for stock clips/images
- Smart captioner that times subtitles to speech
- Auto-music matcher that fits mood and length
Heads-up: Use a clear brief like 30-second product demo with the script generator for better results.
Simple startup checklist for invideo ai video
Follow this quick recipe to produce a shareable video:
- Define goal: ad, tutorial, or social post.
- Pick a template or blank canvas.
- Write a one-line prompt for the script AI.
- Upload logo and brand assets.
- Let AI generate script and voiceover.
- Review scenes, tweak text, and adjust pacing.
- Auto-caption or edit captions manually.
- Export in preferred aspect ratios.

Create videos fast with invideo ai video maker
Think of invideo ai video maker as a smart recipe: pick a template, paste your script, and AI generates a rough cut. Tweak visuals, timing, and voice, then export.
Step-by-step flow:
- Pick a template (promo, social, tutorial).
- Add a short script or paste copy into the AI script box.
- Choose format (16:9, 1:1, 9:16).
- Let AI generate scenes and suggested clips/text.
- Apply brand assets: logo, colors, fonts.
- Replace or accept stock media.
- Add voiceover (TTS or upload).
- Tweak timing and scene durations.
- Use auto-subtitles and fix lines.
- Preview and export.
Typical times:
- Template script: 1–3 min
- Auto-generate scenes: 30–60 sec
- Swap assets voice: 2–5 min
- Final tweaks export: 2–4 min
Tip: Pick a template that already matches your brand colors to cut editing time.
Shortcuts and time-saving habits for invideo ai video
Shortcuts:
- Use prebuilt templates for pacing and scene order.
- Apply brand presets to format scenes at once.
- Auto-resize a project for multiple platforms.
- Replace media in bulk across scenes.
- Use text-to-speech for instant voiceover drafts.
- Turn on auto-subtitles and edit the generated text.
- Duplicate perfected scenes instead of rebuilding.
- Group-edit timing, transitions, or effects.
- Save recurring sequences as favorites.
- Export a low-res draft to test flow, then export final.
Habits:
- Plan a 3-line script before opening the editor.
- Keep a simple asset library: logos, 3 fonts, 4 color swatches, go-to clips.
- Use the same template family for series.
- Name files and scenes clearly.
- Batch-record voiceovers or scripts.
- Limit revisions to two passes: rough cut and polish.
Quick hack: Create a 15-second starter scene with your logo and CTA to drop into every video.

Using invideo ai text to video vs invideo ai script to video
Use invideo ai text to video for fast clips from short copy or blog paragraphs. Use invideo ai script to video when you have a full script with scene breaks and want precise control.
Workflow:
- Pick the goal: reel, explainer, or ad.
- Feed text or script into the right tool.
- Let the tool suggest visuals, then edit.
- Tweak timing, voice, and captions.
- Export and share.
Comparison:
| Tool | Best for | Speed vs Control |
|---|---|---|
| invideo ai text to video | Quick clips from paragraphs or headlines | Fast, moderate control |
| invideo ai script to video | Multi-scene scripts, precise timing | Slower, higher control |
Note: For simple reels start with text to video; for branded sequences pick script to video.
Writing clear scripts for invideo ai text to video
Good scripts are like recipes: short steps, clear ingredients.
Guidelines:
- Start with a one-line hook.
- Break copy into 8–12 second chunks—each becomes a scene.
- Use plain verbs and concrete nouns.
- Add a short CTA at the end.
- Mark tone and pacing (upbeat, calm, fast).
Tip: Keep sentences under 12 words for better scene matches and cleaner captions.
Easy script template (60s):
- Hook (0–5s): [Bold line]
- Problem (6–12s): [One sentence]
- Solution (13–25s): [Product or tip in action]
- How it works (26–40s): [Three short bullets]
- Social proof (41–50s): [Quote or stat]
- CTA (51–60s): [What to do next]
Example scene grid:
| Scene | Script line example | Visual cue | Duration |
|---|---|---|---|
| Hook | “Tired of messy cables?” | Close-up of tangled cords | 4s |
| Problem | “They slow you down.” | Frustrated person at desk | 6s |
| Solution | “Try CableClip — snaps on in seconds.” | Product demo | 12s |
| How it works | “Clip. Pull. Go.” | 3 quick cuts | 15s |
| Proof | “Used by 10k pros.” | Badge/testimonial | 9s |
| CTA | “Get yours today — link below.” | Button or URL | 4s |
Bracket exact on-screen text to guide the AI for captions and visual matches.
If you want to try it out for yourself and see how the platform works in practice, you can start your first project for free through this special link I used to test it . That’s how I began exploring all its features without any hassle.
Pick and customize templates for your brand
Choosing a template is like picking an outfit—match the mood and make it yours.
Quick flow:
- Choose video goal: awareness, demo, ad, or explainer.
- Select format for your platform (16:9, 9:16, 1:1).
- Scan templates for tone: upbeat, professional, calm, playful.
- Replace sample text and swap stock clips for your footage.
- Apply the Brand Kit: logo, fonts, and colors.
- Shorten scenes for social and keep transitions consistent.
- Add captions and a clear CTA.
Template types and tips:
| Template Type | Best for | Length/Format | Quick Tip |
|---|---|---|---|
| Promo / Ad | Social attention grabs | 6–30s, 9:16 or 1:1 | Use bold headlines and one CTA |
| Explainer | Teach how it works | 30–90s, 16:9 | Keep steps simple |
| Product Demo | Show features | 15–60s | Close-ups sell better |
| Testimonial | Build trust | 15–60s | Real faces, short soundbites |
| Event / Announcement | Share dates | 10–45s | Big date text, upbeat music |
| Intro / Outro | Brand consistency | 3–10s | Keep logo and slogan brief |
Add logos, fonts, and colors in the editor
Upload brand assets and set a Brand Kit so every scene reads like you.
Steps:
- Upload logo (PNG with transparency) and media via Media/Uploads.
- Open Brand Kit and add primary/secondary colors by hex code.
- Upload brand fonts or pick close matches.
- Replace placeholder logos and change text boxes to brand fonts.
- Use color picker for buttons, text, and shapes.
- Lock logo layer if you want it unchanged across scenes.
Heads-up: Preview at full size—what looks fine in the editor can change on a phone screen.
Branding checklist:
- Logo uploaded and in safe zone
- Colors set in Brand Kit (hex codes)
- Fonts uploaded or matched
- Tone matches your message
- Correct aspect ratio selected
- Headline readable on mobile
- Clear CTA in final 3–5 seconds
- Music & VO balanced under dialogue
Add voice and captions with invideo ai voiceover generator and automatic subtitles
You can generate natural-sounding voiceovers and accurate captions quickly.
Workflow:
- Open Voiceover tool and paste script.
- Choose a voice and language.
- Generate and preview the voiceover.
- Turn on Automatic Subtitles or upload a transcript.
- Tweak timing, text breaks, and styling.
- Preview and export.
Making audio sound natural:
- Pick a voice with the right accent/tone.
- Break long sentences into short lines.
- Add punctuation to create natural pauses.
- Slightly slow speed for clarity.
- Preview and re-record lines that sound robotic.
Why auto-subtitles matter:
- They enable viewing without sound (social feeds).
- Help non-native speakers and accessibility.
- Boost discoverability since text is indexable.
- Allow quick translation for other audiences.
Audio & subtitle checks:
- Voice matches audience and region
- Speed slightly slower than default for clarity
- Normalize volume so dialogue is above music
- Add phonetic hints for brand names
- Proofread subtitles and adjust timing (1.5–3s per short line)
- Use high-contrast subtitle styling and avoid covering faces
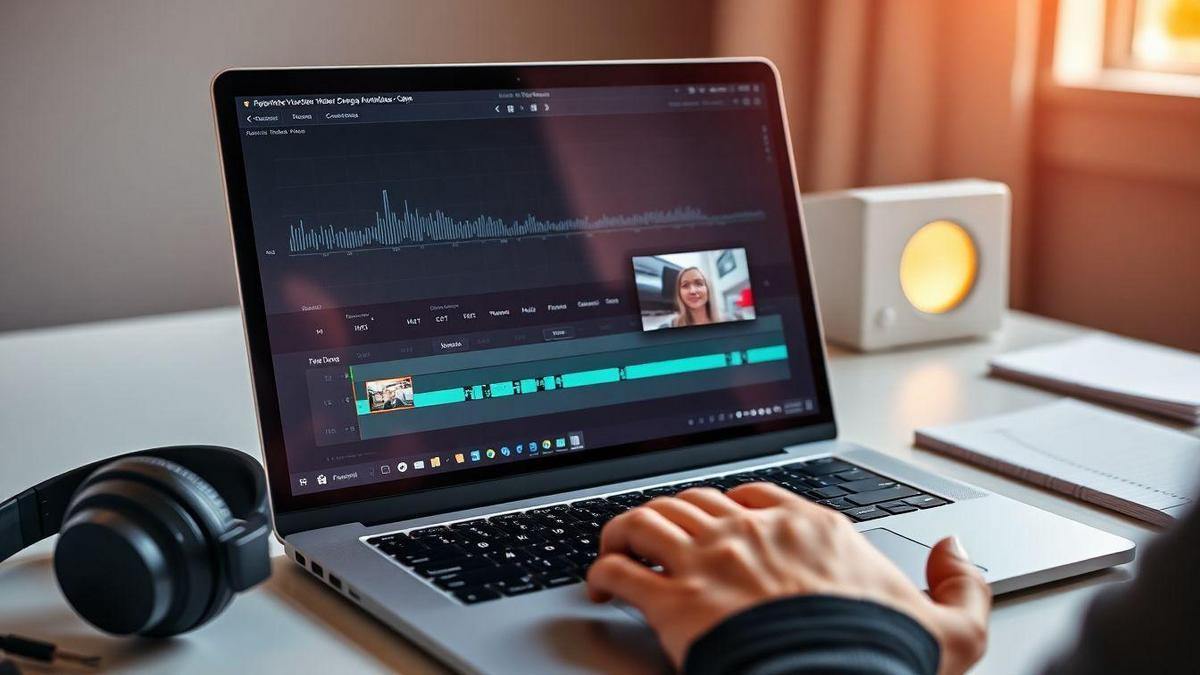
Edit, export, and share using invideo ai video editor
The timeline is straightforward: drag to trim, swap scenes, and use AI suggestions to refine the draft. Add text, voiceovers, and music from built-in libraries, preview, then export.
Editing tips:
- Use Auto-suggest for a first draft.
- Replace stock by dragging your clip onto a scene.
- Adjust duration per scene for pacing.
- Add captions for reach.
- Save a copy before major changes.
Best export formats:
| Format | Best for | Recommended settings |
|---|---|---|
| MP4 (H.264) | Most platforms | 1080p, 30fps, 8–12 Mbps |
| MOV (ProRes) | High-quality archives | 1080p–4K, match source, ProRes for masters |
| WEBM | Web delivery, small size | 720–1080p, 3–6 Mbps |
| GIF | Short silent clips | 480–720p, under 6s |
| Vertical MP4 | Reels, TikTok | 1080×1920, 30fps, 6–10 Mbps |
Callout: Keep a high-quality master (MOV/ProRes or high-bitrate MP4) for re-editing.
Connecting to social platforms:
- Link YouTube, Facebook, LinkedIn from export panel for direct uploads.
- Use platform presets for aspect ratio and length.
- Export captions and thumbnails.
- Use Zapier or scheduler integrations to push files to Buffer or Hootsuite.
- Save projects to Google Drive or Dropbox for team access.
Final publish checklist:
- Preview at full size and speed.
- Proofread captions and check sync.
- Verify aspect ratios and safe margins.
- Balance audio levels (voice over music).
- Export a master and platform-specific copy.
- Upload thumbnail and write a descriptive title/tags.
- Test upload privately before a wide release.
- Back up project and source files.
If you want to try it out for yourself and see how the platform works in practice, you can start your first project for free through this special link I used to test it . That’s how I began exploring all its features without any hassle.
Conclusion
invideo ai video gives you a practical toolkit to speed production without sacrificing quality. Start with a template, let the script generator and voice tools build a first draft, then edit with your brand kit and captions. Use auto-resize, brand presets, and favorites to save time, and always export a high-quality master plus platform-specific files. Use AI where it speeds you up and your judgment where nuance matters.
Want more step-by-step how-tos? Read more at https://blog.marktingdigitalmkt.com.