

invideo ai video
invideo ai video: Fast, simple video creation with AI
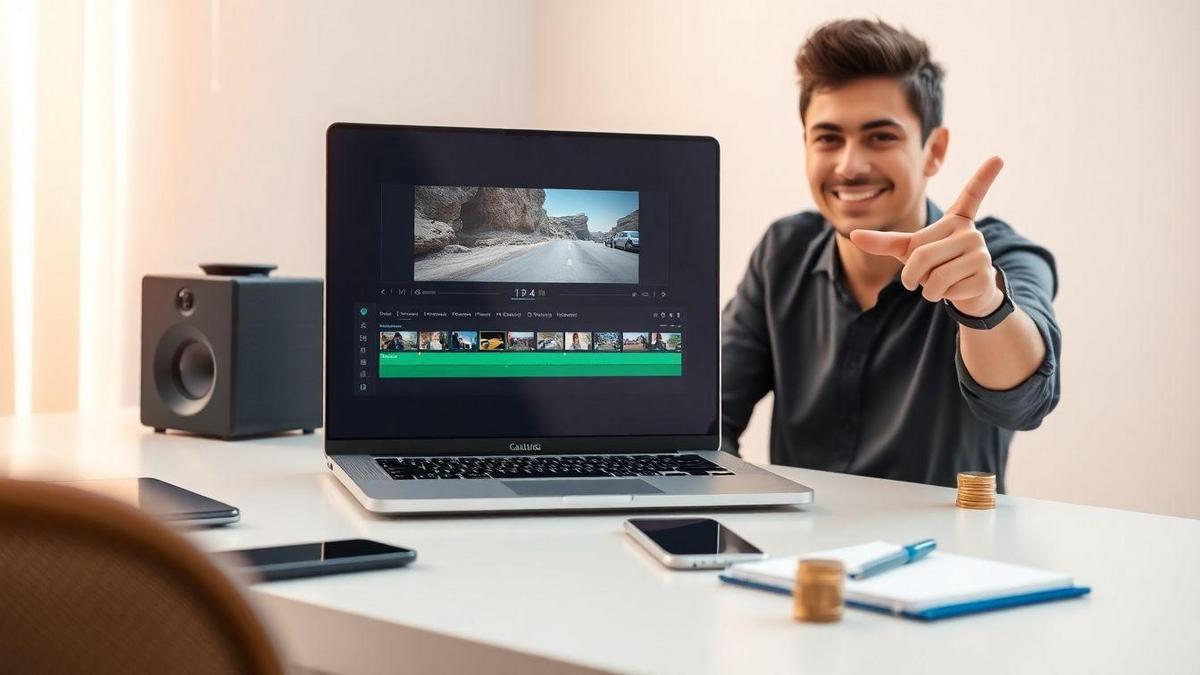
invideo ai video helps you make polished videos quickly. This guide shows how the text-to-video workflow turns a script into timed clips, how the editor trims and crops in seconds, and which templates, automated tools, voiceover options, export formats, and branding controls matter most. Use invideo ai video for social posts, short ads, explainers, and batch content—then test with a free trial or upgrade for higher-quality exports.
If you want to try it out for yourself and see how the platform works in practice, you can start your first project for free through this special link I used to test it . That’s how I began exploring all its features without any hassle.

Key takeaway
- Make videos fast with AI templates and automation.
- Turn text into timed clips with text-to-video.
- Add natural-sounding AI voiceovers or record your own.
- Trim, crop, and reformat with drag-and-drop ease.
- Export and share in the right formats for each platform.

What invideo ai video lets you create fast
You can build videos in minutes, not hours. invideo ai video is great for:
- Social clips (Reels, TikTok, Shorts) optimized for vertical viewing.
- Short ads and promos focused on a single message and CTA.
- Explainers and how-tos with step-by-step visuals.
- Product demos and slideshow-style videos from images and text.
- Intros/outros and lower thirds for consistent branding.
- Training micro-lessons for internal or customer use.
Tip: For speed, pick a template, paste your script, and let the AI assemble footage—then tweak.
How invideo ai video maker turns your script into clips (text to video)
invideo ai video reads your script, splits it into scenes, matches lines to visuals, suggests stock clips, and times each shot. You stay in control while automation handles the heavy lifting.
Workflow:
- Paste a script or bullet points.
- Choose a template or style.
- AI splits text into scenes and suggests visuals.
- Pick a voiceover or upload audio.
- Review, tweak, and export.
| Input | What AI does | What you control |
|---|---|---|
| Script or bullets | Splits into scenes, selects visuals, times clips | Replace visuals, change timing, choose voice |
| Headline CTA | Creates title cards and outro | Edit text, style, CTA button |
| Images or logos | Auto-places and crops for layout | Reposition, scale, replace |
Pro tip: Short sentences work best—AI reads them like cue cards so scenes stay snappy.
Why the invideo ai video editor makes trims and crops simple
Editing feels like moving pieces on a board: drag handles, snap guides, and instant previews make changes obvious and fast.
- Trim start/end with drag handles.
- Crop with aspect presets (16:9, 9:16, 1:1).
- Snap and align tools keep text and logos tidy.
- Auto-resize converts one project into multiple formats.
- Undo and version history let you experiment.
Tip: Trim to the beat for higher engagement; shorter scenes hold attention.
Quick facts: templates, stock, and automated tools
- Templates: hundreds of layouts for ads, explainers, and social posts.
- Stock library: millions of photos, clips, and music tracks.
- Automated voiceover: multiple natural voices and languages.
- Text-to-video: converts scripts into timed clips automatically.
- Multi-format export: one click for square, vertical, and landscape.
- Collaboration: share projects, invite teammates, and leave feedback.

Key features of the invideo ai video generator
- Fast results: invideo ai video helps you build videos in minutes.
- Focus on story: automation reduces fiddly edits so you can be creative.
- Most used tools: templates, automated editing, built-in voiceover, and simple exports.
Automated editing speeds up cuts and scene assembly
- Auto-cut to rhythm: trims clips to match beats or speech.
- Smart scene assembly: suggests scene order and transitions from uploaded clips.
- Template-driven layout: system places text, overlays, and B-roll.
- Fine-tune controls: adjust timing, swap shots, or lock clips.
Tip: For short social clips, run auto-cut first, then one quick manual pass.
Built-in voiceover and audio controls
- AI voice choices with tone and speed adjustments.
- Record directly in the editor for a personal touch.
- One-click noise cleaning removes hiss and background sound.
- Independent audio mixing for music, voice, and effects.
- Auto-generate captions and edit them to match the final cut.
Note: Lower background music by ~10–15% for tutorial videos so voiceover stays clear.
Supported export formats and sharing basics
| Format | Typical use | Max resolution |
|---|---|---|
| MP4 (H.264) | YouTube, Facebook, general use | 1080p common |
| MOV | High-quality delivery, workflows | Up to 4K (plan dependent) |
| GIF | Short clips, previews | Low-res loop |
| Vertical MP4 | TikTok, Reels, Shorts | 1080×1920 |
- Direct uploads: export to YouTube, Facebook, or TikTok from the editor.
- Preset sizes: choose social presets (16:9, 9:16, 1:1).
- Download options: control bitrate and resolution.
- Shareable links: generate review links for teams.
Tip: Check platform specs before exporting—TikTok favors 9:16 vertical; YouTube prefers 16:9 MP4.

Use invideo ai video for social media and short ads
Make eye-catching clips that stop the scroll. With invideo ai video, you can turn a script, a few images, or product shots into polished short ads in minutes. Focus on the hook, the single message, and one strong CTA.
Best practices for social clips:
- Hook in the first 1–3 seconds.
- Use captions and large overlays so the message reads without sound.
- Switch visuals every 1–3 seconds for Reels/Shorts.
- Lead with benefits, not features.
- End with a clear CTA: shop, sign up, learn more.
Tip: Put your logo in a corner and show the CTA for the last 2–3 seconds to improve conversions.
Plan consistent content and CTAs
Batch-produce weekly reels or ad variants in one session:
- Pick a weekly theme (product demo, customer story, quick tip).
- Create 3–5 variants with different hooks.
- Schedule across platforms with the same CTA and tailored copy.
- Track performance and repeat winning hooks.
Note: Consistency beats perfection. Change only one element per test to identify what works.
If you want to try it out for yourself and see how the platform works in practice, you can start your first project for free through this special link I used to test it . That’s how I began exploring all its features without any hassle.
Best runtimes and aspect ratios
| Platform | Best runtime | Aspect ratio | Quick note |
|---|---|---|---|
| Instagram Reels / TikTok / Shorts | 15–30s | 9:16 | Fast hooks, vertical, captions on |
| Instagram Feed | 15–60s | 1:1 or 4:5 | Square/tall fills the feed |
| Facebook Feed | 15–45s | 1:1 | Add captions for mute views |
| Stories | 5–15s/card | 9:16 | Break longer messages into cards |
| LinkedIn Feed | 15–60s | 1:1 or 16:9 | Professional tone and CTA |
| YouTube (long ads) | 30–90s | 16:9 | For deeper storytelling or demos |
Use 9:16 for full-screen immersion; pick square or 4:5 for feed campaigns.

Customize faster with invideo ai templates and styles
Templates are like recipes—plug in your content and get professional results.
Browse and edit templates
- Filter by goal: promo, social, explainer, ad.
- Preview templates, then swap clips and text in the editor.
- Replace media, adjust timing, tweak transitions, and export.
| Template type | Best for | Time saved (typical) |
|---|---|---|
| Promo | Product demos, launches | 30–60 minutes |
| Social | Reels, stories | 15–30 minutes |
| Explainer | How-tos, features | 45–90 minutes |
| Ad | Paid creative, quick tests | 20–50 minutes |
Tip: Use the preview play button before heavy edits to check pacing.
Match your brand with Script to Video and brand kit
Use Script to Video to convert text into timed scenes, then apply your brand:
- Create a brand kit with colors, fonts, and logo placement.
- Save styles to apply across projects so a color or font update updates the whole video.
Simple branding rules:
- Use 2–3 colors.
- Stick to one heading and one body font.
- Put the logo in the same corner every time.
- Reuse intro/outro templates and maintain consistent voice and pacing.

Narration, captions, and accessibility
Narration and captions bridge your message to every viewer. invideo ai video supports clear audio and synced text for people watching with sound off or who are deaf/hard of hearing.
Record or generate voiceover and sync
- Choose AI voice or record yourself in-editor.
- Drag the voice clip into the timeline and align using the waveform.
- Trim pauses and split long takes for tight pacing.
Tip: Try both AI and your own voice to see which fits the mood.
Add captions and subtitles
- Turn on auto-caption to generate a draft, then correct errors.
- Choose caption style (size, color, background) for readability.
- Export SRT files for multi-language publishing and re-run after edits.
| Method | Speed | Control | Best for |
|---|---|---|---|
| Auto-caption | Fast | Medium | Drafts, internal reviews |
| Manual edit | Slow | High | Final published videos |
| Upload SRT | Medium | High | Multi-platform releases |
Always fix auto-captions—small errors hurt credibility.
Tips for clear audio and readable captions:
- Use a quiet room and a good mic.
- Speak steadily and pause between sentences.
- Keep captions to 1–2 short lines (~35–40 chars per line).
- Use sans-serif fonts and high contrast.
- Test on mobile—most viewers watch on small screens.
Getting started and cost basics
invideo ai video is browser-based and mixes templates, AI helpers, and stock media. Start with a free trial to test core features; paid plans remove watermarks, increase export resolution, and unlock team seats and larger stock libraries.
Pricing summary:
- Free tier/trial for core tools (watermark often present).
- Paid plans (monthly/annual) for watermark-free exports, 1080p/4K options, and more assets.
- One-off month can be cost-effective for a single high-quality export.
Free vs paid features
| Feature | Free Trial / Free Plan | Paid Plans |
|---|---|---|
| Watermark | Yes | No |
| Export quality | Up to 720p / limited | 1080p (and 4K on some plans) |
| Templates | Limited | Full library |
| Stock media | Small | Large library, more downloads |
| AI tools | Basic | Full access, faster processing |
| Brand kit & team | No | Yes (colors, logos, seats) |
Tip: Test exports on the free plan before committing—free exports often include a watermark.
Four quick steps to make your first invideo ai video
- Pick a template or start blank.
- Use the AI script tool or paste your script—AI auto-creates scenes.
- Swap in stock clips, images, or your footage; adjust text and brand assets.
- Add voiceover, preview, then export (choose paid plan for watermark-free high-res).
Practice: Do one quick pass, then refine—start rough and polish.
How to test features without committing
- Sign up for the free trial and create a 15–30s video.
- Test Script to Video and check scene cuts and suggested media.
- Export a low-res file to confirm layout, then try voiceover options.
- Invite one collaborator to try sharing and review, and note billing dates before subscribing.
Quick hack: If a watermark blocks a final cut you like, export a short clip as proof, then buy a month to export a watermark-free version.
If you want to try it out for yourself and see how the platform works in practice, you can start your first project for free through this special link I used to test it . That’s how I began exploring all its features without any hassle.
Conclusion
invideo ai video turns scripts into ready-to-share clips fast. Pick a template, paste your script, and the text-to-video engine splits scenes, matches visuals, and times footage—like having an editor at your elbow. The real wins are speed and control: auto trims, quick crops, built-in voiceover, and captions get you from idea to published video quickly. Use automation for batch content and add one manual pass for polish. Try the free trial to test exports and voice options before upgrading.
Want more tips? Read additional guides at https://blog.marktingdigitalmkt.com and keep sharpening your video skills.